Korea Life Guide · 한국생활 가이드

[작성자:] 한국 가이드

  • Found a Lost Item in Korea? Where to Hand It In and What to Record

    Found a Lost Item in Korea? Where to Hand It In and What to Record

    If you find someone’s lost property in Korea, hand it to the staff responsible for the place where you found it whenever possible. That may be a station employee, shop counter, hotel front desk, venue information desk, or a transport operator’s lost-property point.

    If there is no clear responsible desk nearby, take the item to a nearby police office, police box, or police station. Korea’s National Police Agency LOST112 guidance lists these as places where found property can be reported in person. Keep a brief record of what you found, where and when you found it, and where you handed it in.

    Where should you hand in a found item?

    A simple rule works in most situations: use the responsible desk for the location first. If there is no identifiable desk or organization, use a nearby police location.

    Inside a business, building, or venue

    Give the item to the nearest responsible staff member. This is usually the most direct way to keep the item connected to the place where its owner is likely to return.

    • Cafés, restaurants, shops, and department stores
    • Hotels, guesthouses, museums, and attractions
    • University buildings, offices, and apartment lobbies
    • Stadiums, festival venues, and exhibition halls

    State exactly where you found the item, then note the name of the business or desk that received it.

    On public transport or at a transport facility

    Give the item to staff connected with that transport service whenever you can.

    • Train or subway: Go to station staff or an information desk.
    • Bus: Tell the driver, terminal staff, or the operator’s service desk.
    • Airport: Use the relevant information or lost-property desk.
    • Taxi: If you can identify the operator or dispatch service, contact it with the trip details you know.

    The LOST112 nationwide lost-property center directory includes police and participating transport-related organizations, which can help you identify an appropriate hand-in point.

    On a street or in an area with no responsible desk

    Do not leave the item where it is if it is safe and practical to move it. Take it to a nearby police office, police box, or police station. The official LOST112 found-item guidance identifies these locations as in-person reporting points.

    What to record before handing it in

    A short, accurate note is more useful than a long account. Write these details in your phone before or immediately after the handover.

    1. Item type: For example, a black wallet, silver key ring, wireless-earbuds case, tote bag, or phone.
    2. Distinctive features: Note the color, brand, size, stickers, visible damage, or a unique pattern.
    3. Exact location: Be as specific as possible, such as “under table 12 near the window” or “on the northbound platform near the elevator.”
    4. Approximate date and time: A reasonable time range is helpful if you do not know the exact time.
    5. Handover location: Record the shop, station, hotel, office, or police location.
    6. Receiving person or desk: A first name, job title, desk name, or badge number is useful if available.
    7. Reference number or receipt: Keep any handover note or receipt you receive.

    Simple note template

    Item found:
    Description:
    Found at:
    Date and approximate time:
    Handed to:
    Place / desk:
    Reference number or receipt:

    Protect the owner’s privacy

    Do not publicly share photos or details that reveal private information. This is especially important for passports, residence or identity cards, bank cards, boarding passes, home addresses, and phone numbers.

    If you make a public post to help, keep it general, such as “wallet found near the station and handed to station staff.” Let the receiving desk or police office confirm ownership through details that are not publicly visible.

    Should you keep the item while looking for the owner?

    Usually, it is better not to keep it while searching social media. Holding onto the item can make it unclear where it is and who is responsible for it.

    1. Hand it to the responsible desk or a nearby police office.
    2. Keep your handover record.
    3. If appropriate, share only a privacy-safe message that says where you turned it in.

    This gives the owner one clear place to start their search.

    How LOST112 can help the owner

    LOST112 is the Korean National Police Agency’s lost-and-found information system. Its English search service lets users search lost and found property using filters including item category, date, and area.

    Accurate handover details make a useful record possible. A clear description, exact place, and approximate time can help an owner identify a likely match.

    Common mistakes to avoid

    • Leaving the item where you found it: It may be moved, taken, or handed in somewhere else.
    • Giving a vague location: “Near Hongdae” is less useful than a specific nearby business, exit, platform, or landmark.
    • Forgetting the time: Even an estimate such as a half-hour range can help narrow a search.
    • Posting identifying photos online: Never expose card numbers, ID details, addresses, or other sensitive information.
    • Not recording the handover point: The owner may later need to know exactly which desk or police location received the item.

    Example: finding a wallet on a subway platform

    1. Look for nearby station staff or an information point.
    2. Hand the wallet to staff instead of taking it home.
    3. Record the station name, platform direction, approximate time, and staff desk.
    4. Keep any receipt or reference number provided.
    5. Avoid opening the wallet further than necessary or sharing photos of its contents.

    FAQ

    Can I hand a found item to a café or shop employee?

    Yes. If you found it inside or immediately near that business, its staff are usually the most practical first hand-in point. Note the business name and the desk or person who received it.

    What if I found the item on the street?

    If there is no nearby venue or service desk responsible for the area, take it to a nearby police office, police box, or police station. These are listed in the official LOST112 guidance as found-item reporting points.

    Do I need to know the owner’s name?

    No. Provide a clear description of the item and explain where and when you found it. The receiving organization can use those details when checking a possible ownership claim.

    What should I note for a found phone?

    Record its color, brand, case, and the precise place and time it was found. Do not try to access private content. LOST112 also provides guidance and search options related to found mobile phones through its English guide.

    Should I photograph the item?

    A photo may help your own handover record, but do not photograph or share sensitive details from documents, cards, addresses, or phone screens. A concise written description is often enough.

    Final checklist

    • What did I find?
    • Where exactly did I find it?
    • About what time did I find it?
    • Who did I give it to?
    • Where can the owner look for it?
    • Do I have a receipt or reference number?

    A careful handover and a short factual note are two of the most helpful things you can do for someone who has lost an important item in Korea.

    Related articles

    Information current as of: 2026-09-26

    Sources and references

  • How to Order Food in a Korean Restaurant: Portions, Payment & Tipping

    How to Order Food in a Korean Restaurant: Portions, Payment & Tipping

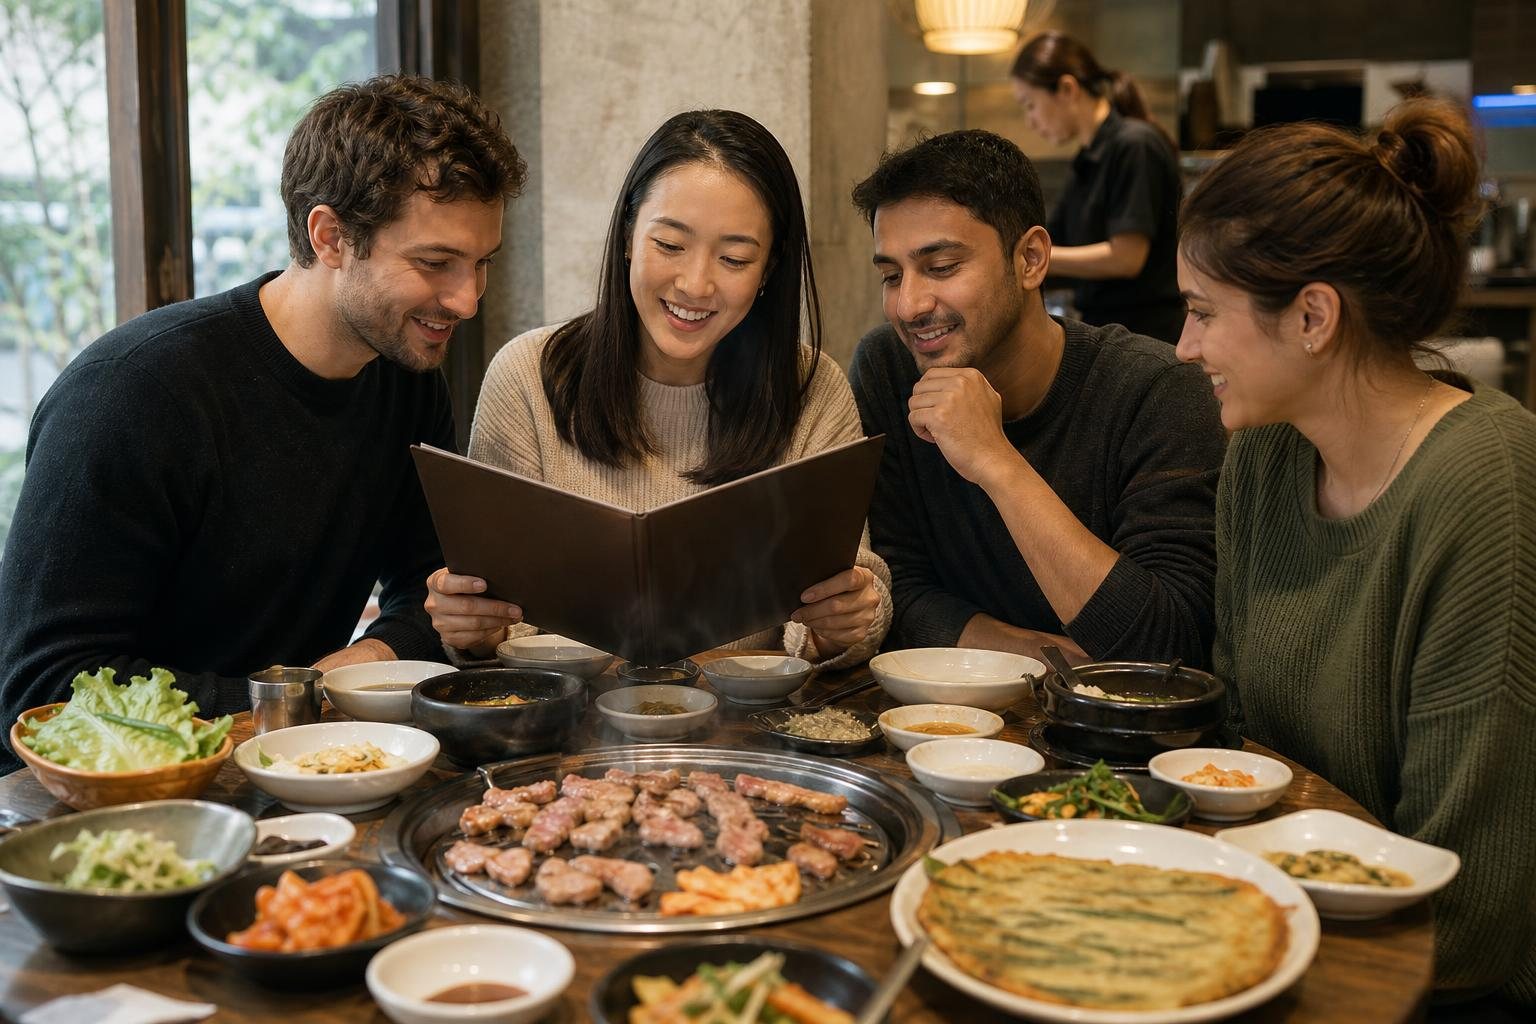
    The key to ordering food in a Korean restaurant is to check whether a dish is for one person or for the table. Rice bowls, soups, stews, and noodle dishes are often individual meals. Barbecue, fried chicken, pancakes, hot pots, and large braised dishes are often shared.

    Payment methods vary by restaurant, so follow signs or ask staff where to pay. Tipping is generally not expected; normally, you pay the displayed total without adding a separate tip.

    Choose between an individual meal and shared food

    Often suitable for one person

    • Bibimbap and other rice bowls
    • Gukbap, soups, and many jjigae stews
    • Naengmyeon and other noodle dishes
    • Baekban or set meals

    A set meal can look substantial because it may include rice, soup, a main item, and several small side dishes. This rice-and-soup meal format with multiple side dishes is a familiar part of Korean dining. VisitKorea describes this style of set meal.

    Often intended for sharing

    • Korean barbecue
    • Fried chicken
    • Kimchi or seafood pancakes
    • Hot pots and large stir-fried dishes
    • Braised chicken, ribs, or seafood platters
    • Multi-person set menus

    Read the menu carefully for serving sizes, minimum orders, or a requirement to order two or more servings. Restaurant menu guidance published by the Korea Tourism Organization includes common notices about minimum servings and additional orders. See the Korean food translation guide.

    How to read the menu

    Do not rely on a photo alone to judge portion size. A picture may show a full table setting, optional additions, or food arranged for several diners.

    • Look for notes such as “one serving,” “for two,” “set menu,” or “minimum order.”
    • Check whether rice is included or must be ordered separately.
    • Ask whether a dish is spicy if that matters to you.
    • Wait for the main order before adding extra side dishes; small dishes may arrive with the meal.

    Small side dishes are called banchan. They can include kimchi, vegetables, pickles, or seasoned items, and are commonly served alongside the main food.

    A simple ordering process

    1. Decide whether your group wants individual meals, shared dishes, or both.
    2. Check serving notes before ordering barbecue, hot pot, fried chicken, or other large dishes.
    3. Order through the method used by that restaurant: staff, a table call button, a paper slip, QR ordering, a kiosk, or the counter.
    4. Start with the main food rather than ordering too many extras at once.
    5. Add more only after you see the portions and decide you need it.

    Depending on the restaurant, you may find a call button, utensil drawer, self-service water station, side-dish station, or a grill built into the table. These are common features visitors may encounter. VisitKorea’s Korean food guide also notes that a spoon is normal for rice and soup.

    Useful phrases to ask staff

    • “Is this for one person or for sharing?”
    • “How many people is this for?”
    • “Can one person order this?”
    • “Does this come with rice?”
    • “Is it spicy?”
    • “No pork, please.”
    • “No seafood, please.”
    • “Can we order one more?”
    • “Where do we pay?”

    If you have an allergy, dietary restriction, or ingredient you must avoid, ask about that specific ingredient. Broths, sauces, toppings, and side dishes can contain ingredients that are not obvious from a menu name.

    Paying for your meal

    There is no single payment routine for every Korean restaurant. You may pay at a counter after eating, use a kiosk before or while ordering, pay through a table-order system, or ask staff for the bill.

    1. Finish your meal and look near the entrance or counter for payment signs.
    2. If the process is not clear, ask, “Where do we pay?”
    3. Review the screen or receipt before confirming payment.
    4. Keep the receipt until you leave.

    Confirm accepted payment methods with the restaurant if you have a preferred way to pay. The Korea Tourism Organization’s menu translation guidance includes examples of counter payment, kiosk payment, and payment before food is served.

    If your group wants to split the cost, agree on the method before approaching the counter. Some restaurants can divide the total across several cards, while others prefer one payment for the table. Ask staff before presenting multiple cards, and use the amount shown on the receipt or payment screen as the final total.

    Tipping in Korean restaurants

    Tipping is generally not expected in Korean restaurants. The usual approach is to pay the amount shown by the restaurant. If a kiosk or card terminal shows an unfamiliar option, read the screen carefully and ask staff if needed.

    Common mistakes to avoid

    • Ordering too much immediately: Several shared dishes can quickly become more food than a group needs.
    • Assuming barbecue is always a one-person order: Check serving units and minimum-order notes first.
    • Mistaking banchan for extra orders: Wait until the main food arrives before deciding to add more.
    • Waiting silently for help: Use the call button, raise your hand politely, or go to the counter.
    • Assuming familiar-looking food is mild: Ask about spiciness before ordering.

    FAQ

    Can I eat alone at a Korean restaurant?

    Yes. Rice bowls, soups, stews, noodle dishes, and many set meals are practical choices for one person. Check serving requirements before choosing barbecue or a large shared dish.

    Is all Korean restaurant food shared?

    No. Individual meals are common, especially rice bowls, soups, stews, and noodles. Sharing is more common with barbecue, pancakes, hot pots, fried chicken, and large braised dishes.

    Do I need to order rice separately?

    Sometimes. Rice may be included with a soup, stew, or set meal, but not with every dish. Check the menu or ask before ordering extra rice.

    Can I eat the small dishes on the table?

    They are usually side dishes served with the meal. Practices vary, so follow table signs and ask if you are unsure.

    Should I leave a tip?

    Generally, no. Tipping is not normally expected in Korean restaurants.

    Where do I pay?

    Look for signs near the entrance or counter, or ask staff. The payment point may be a counter, kiosk, or table-order system depending on the restaurant.

    Related articles

    Information current as of: 2026-09-25

    Sources and references

  • Eating Alone at a Korean Traditional Market: Ordering, Seating, and Portion Tips

    Eating Alone at a Korean Traditional Market: Ordering, Seating, and Portion Tips

    Eating alone at a Korean traditional market is easy once you choose the right stall. For a seated meal, look for a counter-style vendor with its own stools or tables; for casual browsing, choose a small snack that is easy to carry.

    The most useful rule is to order first and ask before sitting down. Market layouts vary: some sellers have seating for their own customers, while other stalls are mainly for takeaway. Start with one item, then decide whether you want more.

    The best solo-dining strategy

    1. Walk through the food area once before buying.
    2. Decide whether you want a proper seated meal or a few small snacks.
    3. Order one substantial item first.
    4. Add only one or two small items if you are still hungry.
    5. Ask whether you may eat at the stall before taking a seat.

    Traditional markets can have noodle dishes, rice dishes, gimbap, pancakes, fried snacks, fish cakes, sweets, and skewers in the same area. Food stalls can be tempting when you are hungry, so a one-item-first approach helps avoid an overly large meal.

    Choose the right type of stall

    Counter or table-service stalls

    If you want to sit down, look for a visible menu, an active cooking counter, and stools or tables immediately in front of the vendor. These stalls are often the simplest option for one person: order one menu item, confirm the seat, and eat there.

    Solo-friendly choices may include noodles, a rice dish, gimbap, dumplings, or soup. A small plate of pancakes or fried food can also work when the vendor presents it as an individual order.

    Do not assume that every table near a stall is shared public seating. At some market food alleys, tables are placed directly in front of individual shops for that shop’s customers. Seoul’s official travel guide notes the market-based food-stall setting at Seoul Central Market.

    Snack stalls

    Snack stalls are a good choice if you prefer to walk, browse, and try a little at a time. Common options include skewers, fish cakes, hotteok, croquettes, small breads, and fried snacks.

    VISITKOREA’s guide to bunsik and street food introduces familiar items such as tteokbokki, fried foods, sundae, gimbap, fish cakes, and skewers. Pick a visibly individual item when you want a light stop rather than a full meal.

    Prepared-food shops

    If food is already packed in containers and there is no seating, treat it as takeaway unless the seller tells you otherwise. Some markets have both eat-in and takeout options, but the arrangement is different from shop to shop. VISITKOREA’s Mangwon-dong feature, for example, describes a mix of shops with seating and food that visitors eat standing nearby or take away.

    How to order with limited Korean

    You do not need a long conversation. Pointing to the menu or display, showing one finger, and asking one short question is usually enough.

    1. Look at the menu, photographs, or displayed food.
    2. Point to the item you want.
    3. Hold up one finger to show that you want one order.
    4. Ask whether it is one serving or whether a smaller amount is possible.
    5. Confirm whether you will eat there or take it away.

    Useful phrases

    • Igeo juseyo. — This one, please.
    • Il-inbun juseyo. — One serving, please.
    • Yeogi meogeodo dwaeyo? — May I eat here?
    • Pojang haejuseyo. — Please pack it to go.
    • Jogeumman juseyo. — Just a little, please.

    If the menu has no English, use food photographs, watch what nearby customers receive, or use a translation app for a short question. Keep requests simple: “One serving?” and “Eat here?” are usually easier to communicate than a detailed customization request.

    Where to sit

    Ask before sitting at an empty table. A chair may belong to a particular vendor, be intended for waiting customers, or not be available for dining.

    Order first, then ask: “Yeogi meogeodo dwaeyo?” — “May I eat here?”

    When seating is crowded, choose food that is easy to carry, request takeaway packaging, continue browsing, or return later. Some markets include food courts or designated dining spaces, while others mainly consist of individual vendors. VISITKOREA’s traditional-market guide includes both food streets and food courts, illustrating how much layouts can differ.

    How to avoid oversized portions

    The most common solo-dining mistake is treating every market item as a small snack. Check what another customer receives before ordering, especially when the display shows large pancakes, mixed fried-food plates, chicken trays, shared platters, preset bundles, or food sold by weight.

    Often easier for one person

    • A bowl of noodles or soup
    • One gimbap roll
    • A skewer or fish cake on a stick
    • One hotteok or filled bread
    • A single croquette or similar fried snack
    • A small serving of dumplings

    A practical portion plan

    • Option 1: One seated main dish.
    • Option 2: One filling snack and one small extra.
    • Option 3: Two light items, then pause before buying more.

    When you see a large platter, ask for one serving rather than pointing to the entire display. Not every vendor can split or reduce a fixed portion, so accept the seller’s answer if a smaller order is not available.

    A simple first-time example

    1. Walk through the food aisle without buying immediately.
    2. Choose a noodle or rice-based stall if you want to sit.
    3. Point to one item and say, “Il-inbun juseyo.”
    4. Ask, “Yeogi meogeodo dwaeyo?”
    5. Finish the main dish before deciding on another item.
    6. If you still want more, choose one small sweet or skewer.

    This is usually easier than buying pancakes, fried snacks, gimbap, and dessert all at once.

    Small etiquette habits that help

    • Stay close to the stall where you bought food unless the seller directs you elsewhere.
    • Do not assume another vendor’s chairs are shared seating.
    • Step aside after ordering if the counter or aisle is narrow.
    • Return trays, dishes, and utensils where the stall indicates.
    • Carry tissues or napkins for convenience.
    • Check payment arrangements at the stall before adding extra items, as methods can differ by shop.

    Common mistakes to avoid

    Ordering a full market feast immediately

    Start with one item. You can always buy more after you eat, but carrying leftovers through a crowded market is inconvenient.

    Using another stall’s table

    Even when a table is empty, it may be intended for customers of the vendor who provides it. Asking first prevents confusion.

    Expecting every stall to customize a portion

    You can politely ask for a smaller amount, but some vendors sell only fixed portions. Choose an individual snack or a clear one-serving menu item if portion size matters.

    FAQ

    Is it okay to eat alone at a Korean traditional market?

    Yes. A solo visitor can choose a counter-style stall, a snack stand, or a market dining area. Pick a vendor with visible seating when you want a relaxed sit-down meal.

    Can I sit at any empty table?

    No. Ask first because the table may belong to a specific vendor or be used by waiting customers.

    What should I order if I do not want a large portion?

    Start with a skewer, fish cake, hotteok, croquette, small gimbap option, or another visibly individual item. For a full meal, choose a dish clearly shown as one serving.

    Can I ask for a smaller portion?

    You can ask, but it may not be possible at every stall. Say “Jogeumman juseyo” or point to the food and ask for one serving.

    Should I eat at the stall or take food away?

    Follow the setup. If the stall has stools or tables directly in front, ask whether you may eat there. If food is packaged and there is no seating, takeaway is usually the simpler option.

    What is the easiest phrase for solo ordering?

    “Il-inbun juseyo” means “One serving, please.” Point to the food you want as you say it.

    Traditional markets range from compact neighborhood markets to large food destinations. There is no single rule for every market, so observe the stall, order one item at a time, and ask before sitting. For broader market-travel information, see VISITKOREA’s traditional markets guide.

    Related articles

    Information current as of: 2026-09-23

    Sources and references

  • Incheon Airport to Seoul After Midnight: Late-Night Bus, Taxi & Backup Options

    Incheon Airport to Seoul After Midnight: Late-Night Bus, Taxi & Backup Options

    If your flight reaches Incheon Airport after midnight, make your Seoul transfer decision based on your real ready-to-leave time, not your scheduled landing time. Collect your bags, complete arrival procedures, confirm whether you are at Terminal 1 or Terminal 2, and then check the transport information currently available at the airport.

    The easiest late-night choice is usually the one that reduces uncertainty and transfers. Confirm your exact accommodation address, compare the full door-to-door journey, and keep a backup option in case your original plan is no longer available.

    Current official late-night bus options include N6000 to Gangnam Express Bus Terminal, N6002 to Cheongnyangni via Hongdae, N6701 to Dongdaemun Design Plaza via Mapo and Seoul Station, and N6703 toward Gwangnaru via COEX and Jamsil. Check your terminal and the airport’s live timetable before buying a ticket.

    Late-night buses from Incheon Airport: routes and fares

    Route Useful Seoul stops Adult fare
    N6000 Songjeong · Yeomchang · Gangnam Express Bus Terminal KRW 17,000
    N6002 Hongdae · Four Seasons Hotel · Dongdaemun · Cheongnyangni KRW 17,000
    N6701 Mapo · Seoul Station · Euljiro · Dongdaemun Design Plaza KRW 18,000
    N6703 Seorae Village · COEX · Jamsil · Gangbyeon · Gwangnaru KRW 18,000

    Terminal 1 and Terminal 2 have different departure times. For example, the official airport timetable currently shows N6701 departing Terminal 1 at 23:50, 00:40, 01:40, 03:45 and 04:40, while Terminal 2 departures are 23:30, 00:20, 01:20, 03:25 and 04:20. Timetables can change, so treat these as a planning reference and recheck the official airport page on your travel date.

    Start with your real ready-to-leave time

    Landing is only the beginning of your airport journey. Your practical departure time comes after you leave the aircraft, walk to arrivals, collect checked baggage, complete arrival procedures, and reach the public arrivals area.

    Before heading to a bus stop, rail platform, or pickup point, take a moment to estimate when you can actually leave the terminal. A delay can change whether a planned connection still makes sense.

    Why this check matters

    A route that looked simple before the flight may no longer fit your actual arrival situation. Begin your late-night plan inside the terminal, after you know that you are ready to travel onward.

    Confirm which terminal you arrived at

    Incheon Airport has Terminal 1 and Terminal 2. Boarding points, route information, and pickup instructions can differ by terminal, so confirm your location before following directions from a booking message or an older travel plan.

    • Check your arrival terminal.
    • Compare it with the terminal named in any pickup or transfer booking.
    • Confirm your full accommodation address and destination area.
    • Check whether a person meeting you expects a specific terminal.

    Incheon Airport publishes transport information by terminal, including guidance for public transportation and late-night options. See Incheon Airport public transportation information.

    Do not change terminals without a clear reason

    If a driver, companion, or route is connected to the other terminal, verify that moving will solve the problem before you go. The airport provides inter-terminal transfer guidance, including shuttle-bus and Airport Railroad options. Check inter-terminal transportation guidance.

    With children, heavy bags, or a low phone battery, an unnecessary terminal transfer can add avoidable stress.

    Check your transport options in the right order

    1. Confirm whether a pre-booked transfer still works

    If you arranged an airport pickup, hotel transfer, rental-car collection, or private driver, open the confirmation message before leaving arrivals. Check the meeting location, terminal, flight-number details, and instructions for a delayed arrival.

    • Which terminal does the booking use?
    • Where is the meeting point?
    • Does the provider require a delay update?
    • How will the driver or provider identify you?
    • What should you do if you arrive substantially later than planned?

    Do not walk to a vague meeting place from memory. Match the booking details with the terminal where you actually arrived.

    2. Check current airport transport information

    For a delayed arrival, use information displayed at the airport and the airport’s official transport pages. Incheon Airport provides guidance for airport buses, late-night buses, Airport Railroad, taxis, and call vans. See Incheon Airport ground transportation guidance.

    • Check which services are shown for your terminal.
    • Check the destination area and boarding location.
    • Confirm the next available option rather than relying on an old plan.
    • Consider whether your luggage is manageable for the route.

    Do not rely only on an old blog post, a saved timetable, or a screenshot from a previous trip.

    3. Compare destinations, not only transport types

    “Seoul” is not a single drop-off point. A bus, rail connection, taxi, or pre-booked ride can leave you in very different places. Before choosing, save your hotel name, full address, nearest major station or neighborhood, and accommodation contact details.

    A Korean-language address or a map pin can also make communication easier. The aim is to avoid arriving at a major hub without a clear plan for the final part of the journey.

    Choose the option that reduces transfers

    After a delayed international flight, the fastest-looking route is not always the easiest one. Choose based on the full journey to your accommodation door.

    An airport bus may be simpler when

    • Your accommodation is near a listed stop.
    • You have bulky luggage.
    • You prefer to avoid navigating several stations.
    • You are unfamiliar with Seoul’s rail network.

    The Airport Railroad may be suitable when

    • Your destination connects easily from a rail station.
    • You are comfortable moving through stations with luggage.
    • You have checked the current information at the airport.
    • You have a clear final-transfer plan from the station.

    A taxi or call van may be practical when

    • You are travelling as a group.
    • You have several large suitcases.
    • Your accommodation is difficult to reach from a major station.
    • Your original public-transport plan is no longer available.
    • You want to travel directly to the accommodation address.

    For payment, confirm the accepted method at the official counter, boarding point, or with the driver. Arrangements can vary by service, destination, and provider.

    Prepare your destination before leaving airport Wi-Fi

    Before you leave the terminal, save the details that you may need when your battery is low or connectivity is less convenient.

    • A screenshot of your hotel or accommodation booking
    • Your full destination address
    • The accommodation phone number or messaging contact
    • A saved map pin, if possible
    • A screenshot of any pickup booking
    • A backup route to a major Seoul location
    • A charging cable or power bank, if available

    Use a full address instead of only a hotel name. Similar or abbreviated property names can cause confusion, while a complete address is clearer for a driver or when entering a destination into a map.

    Common mistakes to avoid

    Following the crowd

    Other passengers may be going to another terminal, a different destination, or a different type of transport. Follow signs for your own confirmed option.

    Planning only as far as central Seoul

    Reaching Seoul Station or another major hub may still leave you with a final trip to complete. Decide how you will cover that final leg before leaving the airport.

    Assuming an old timetable still applies

    Late-night travel plans need current information. Check the airport’s displays and official pages rather than depending on information saved before your flight delay.

    Changing terminals before confirming the need

    Changing terminals can add walking and waiting. Do it only when your confirmed booking, companion, or preferred route requires it.

    Leaving without saved accommodation details

    Save essential information while you have time and connectivity in the terminal. This small step can make the rest of the journey much easier.

    Late-night arrival checklist

    • I know whether I am at Terminal 1 or Terminal 2.
    • I have my full Seoul destination, not just a district name.
    • I checked current airport information for my transport option.
    • I know where to board or meet my driver.
    • I have a backup option if my first choice is unavailable.
    • I saved my accommodation details and contact information.
    • I considered the final journey from the Seoul drop-off point to my door.
    • I checked my luggage, phone battery, and payment method.

    FAQ

    Can I still get from Incheon Airport to Seoul after midnight?

    It may be possible, but the practical choice depends on your actual ready-to-leave time, terminal, destination, and the services currently available. Check airport information after you arrive instead of relying only on your pre-delay plan.

    Should I book a taxi before arriving?

    A pre-booked ride can be convenient when you want a planned meeting arrangement, have large luggage, or are staying somewhere difficult to reach. Read the terminal and delay instructions carefully. If you use an airport taxi, follow the airport’s designated taxi guidance.

    Is the Airport Railroad always the best choice?

    No. It can be convenient for some destinations, but several transfers with luggage may be tiring after a delayed flight. Compare the complete door-to-door trip before deciding.

    What if my hotel is near Seoul Station?

    That may make some rail or bus options easier, but it does not automatically make them the best choice. Check the actual hotel entrance, your luggage needs, and the final distance from the stop or station.

    What should I do first after arriving late?

    Confirm your terminal and your real ready-to-leave time. Then check the airport’s current transportation information for that terminal and compare options using your exact destination.

    Related articles

    Information current as of: 2026-09-22

    Sources and references

  • Left a Bag in a Seoul Taxi? Find the Operator From Your Receipt or Booking

    Left a Bag in a Seoul Taxi? Find the Operator From Your Receipt or Booking

    If you left a bag in a Seoul taxi, start with your taxi receipt, app trip history, booking confirmation, or email receipt. These records can help identify the specific vehicle, driver, or taxi operator so you can report the item directly. A citywide lost-property search is generally a useful follow-up step when you cannot identify the taxi.

    Check the completed ride record as soon as possible and send a short report with the ride time, pickup and drop-off locations, vehicle number if available, and a clear description of the bag. Seoul guidance says card-payment taxi receipts can contain useful details such as vehicle information, ride time, and operator contact information. Seoul Metropolitan Government

    Start with the record you have

    Use the first record you can access. The goal is to connect your lost bag to one specific trip.

    1. Paper taxi receipt: Look for the operator or company name, vehicle number, ride time, and telephone number.
    2. Taxi-booking app record: Open the completed trip in the account used to book the ride. Check trip details, the digital receipt, vehicle or driver details, and the app’s help section.
    3. Email receipt or payment record: Search for a ride confirmation. A card transaction time can also help you match the payment to the trip.
    4. Photo or screenshot: A picture of the plate, dashboard display, driver information, or booking screen may help identify the vehicle.

    If you booked through an app, begin in that app even if the vehicle was a regular taxi. The platform may hold the trip record, while the actual vehicle operator may be a separate taxi company or an individual driver.

    If you have a paper taxi receipt

    A receipt may be the quickest way to identify the right taxi. Seoul advises keeping taxi receipts because their information can make it easier to contact the relevant operator after an item is left behind. Seoul Metropolitan Government

    Details to look for

    • Taxi company or business name
    • Telephone number
    • Vehicle registration or plate number
    • Date and approximate pickup or drop-off time
    • Fare or payment reference
    • Driver name or business information, if shown

    What to do next

    Contact the number on the receipt and give the operator enough information to locate the trip:

    • Ride date and approximate time
    • Pickup and drop-off locations
    • Vehicle number, if shown
    • A clear description of the bag
    • Your name and a reliable email address or phone number

    Do not send unnecessary sensitive information. The operator generally needs trip details and enough description to verify ownership, not passport scans, bank-card images, full card numbers, or account passwords.

    If you booked through an app

    For an app-booked taxi, the completed trip record is usually the best starting point. Open the past ride rather than the current booking screen.

    Check the completed trip details

    • Pickup and destination
    • Ride date and time
    • Vehicle plate number
    • Driver or operator details
    • Digital receipt or invoice
    • Help, support, or lost-item reporting options

    Use the same account that created the booking. If a friend, hotel staff member, employer, or travel companion booked the taxi, ask that account holder to check the trip record and submit the request. Platforms may limit trip support to the account holder.

    For example, Uber directs riders with app-booked trips to its in-app Help area. Its guidance for street-hailed Uber Taxi rides also notes that receipt details such as driver ID and vehicle registration can be used for a report. Uber Help

    Save the key evidence

    Before submitting a report, save screenshots of the completed trip:

    • Pickup and drop-off points
    • Date and time
    • Vehicle plate and driver information
    • Receipt or booking number
    • Any message confirming the ride was completed

    Do not assume the booking app and taxi operator are the same business. The app may arrange the trip, but the driver, individual taxi operator, taxi company office, or a partner transport company may need to check the vehicle.

    A message template for the operator or support team

    Keep your first message brief and easy to verify.

    Hello. I believe I left a bag in your taxi.
    Ride date: [date]
    Approximate time: [time]
    Pickup: [place]
    Drop-off: [place]
    Vehicle number: [if known]
    Bag description: [color, size, brand, distinctive item inside]
    Please let me know if the driver has found it. You can contact me at [email or phone number]. Thank you.

    Useful identifying details include the bag’s color, size, type, brand, and one distinctive feature such as a keychain, strap, sticker, or cover. You can mention general contents, such as an umbrella or book, but keep highly sensitive details private until the correct trip is confirmed.

    If you cannot identify the operator

    If you have no receipt, app record, or vehicle information, write down a timeline before using a broader lost-property route.

    • Approximate pickup and drop-off points
    • A realistic time window
    • Taxi color or type, if remembered
    • How you paid
    • Whether you hailed the taxi, used a hotel queue, or booked in an app
    • A description of the bag and its contents

    Seoul’s official visitor guide directs travelers to the National Police Agency’s LOST112 integrated lost-and-found portal for reporting and searching for found items. This can be a useful follow-up when direct contact with the taxi operator does not locate the bag. Official Travel Guide to Seoul

    Common mistakes that slow down recovery

    Contacting the wrong business

    A taxi logo, booking platform, payment processor, and vehicle operator may be different entities. Use the vehicle number, ride time, and receipt information to focus on the specific trip.

    Giving only a vague bag description

    “A black bag” is difficult to verify. Add one or two non-sensitive identifying features, but do not reveal private document or financial information in the first message.

    Waiting to check the app and email receipt

    Even when payment happened in the vehicle, the booking app or email inbox may preserve the assigned driver, vehicle, and trip details. Check both.

    Using another person’s booking without them

    If someone else made the booking, ask them to submit the report through their account. Uber notes that trip support may need to be handled through the rider account used for the trip. Uber Help

    Assuming the driver has already seen the bag

    A bag may be under a seat, in the trunk, or unnoticed until the vehicle is checked. Give the operator precise trip details, then allow time for the driver or company to confirm.

    Arrange the return safely

    When the bag is located, confirm the collection details in writing:

    • The item description matches your bag
    • Where it can be collected
    • Who will hand it over
    • What identification or booking evidence you should bring
    • Whether another person may collect it for you

    If a delivery or payment arrangement is discussed, confirm the details directly with the operator before agreeing. Return arrangements can differ depending on the location of the taxi and passenger.

    What to save after every taxi ride

    • Paper receipt
    • App receipt or invoice
    • Screenshot of the completed booking
    • Vehicle plate number
    • Pickup and drop-off locations

    Saving these details makes it much easier to identify a taxi if you leave an item behind.

    FAQ

    Can I find the taxi company from a card-payment receipt?

    Often, yes. Taxi receipts can show operator contact details, vehicle information, and the ride time, which can help you contact the relevant company or driver. Seoul Metropolitan Government

    I booked through an app but paid in the taxi. Should I still use the app?

    Yes. The completed booking may still show the assigned vehicle, trip details, or a lost-item support route. Save screenshots of the trip before contacting support.

    What if my friend booked the taxi for me?

    Ask the person who made the booking to check their trip history and submit the lost-item request. The platform may only discuss trip details with the account holder.

    What if I only know where I got out?

    Provide the approximate drop-off location, time window, payment method, and bag description. Add the pickup point if you remember it. A realistic narrow time window is more useful than an exact time you are not sure about.

    Should I post photos of my passport, cards, or bag contents online?

    No. Use the taxi operator, official app support, or an established lost-property channel, and share only the minimum information needed to identify the bag.

    I cannot reach the operator. What should I do next?

    Keep your receipt, screenshots, and trip timeline together, then use a broader lost-property report or search route. Seoul’s visitor guide points travelers to the National Police Agency’s LOST112 portal. Official Travel Guide to Seoul

    Related articles

    Information current as of: 2026-09-21

    Sources and references

  • How to Buy K-pop Concert Tickets in Korea: Foreigners’ Guide

    How to Buy K-pop Concert Tickets in Korea: Foreigners’ Guide

    The safest way to buy a K-pop concert ticket in Korea is to use the ticket seller named in the artist’s, promoter’s, or event’s official announcement. Then follow the booking and entry instructions on that specific concert page. There is no single ticketing process that applies to every show.

    For foreign visitors and residents, the biggest avoidable problems are using the wrong site channel, registering with a name that differs from the passport, missing a required identity-verification step, or expecting a ticket in another person’s name to work at entry. Use your physical passport details consistently and check the event page before you book.

    Start with the official seller named by the event

    K-pop concerts in Korea can be sold through different ticket platforms. Do not choose a site only because it looks familiar in search results. Instead, begin with an official announcement from the artist, label, fan club, promoter, or venue.

    1. Find the official event announcement.
    2. Identify the ticket platform linked or named in that announcement.
    3. Open the concert page on that platform.
    4. Confirm the concert title, city, venue, and booking channel before signing in or paying.

    A platform may have separate Korean-language and global booking channels. YES24 states that its global ticket service requires a separate Global YES24 Ticket account, and it notes that a show’s own detail page takes priority when collection or entry arrangements differ. YES24 Ticket FAQ

    Use the exact channel shown in the notice

    An official seller does not always mean that every version of that seller’s website works the same way. A concert may use a global page for overseas buyers, a Korean channel, a fan-club presale route, or a general-sale route.

    For selected Ticketlink global events, overseas users are instructed to register through the global page and complete passport verification before booking is available. Ticketlink global event notice

    Practical rule: If the official notice directs you to a global page, use that exact path. Do not assume that a Korean-site account and a global-site account are interchangeable.

    Set up your account before ticket sales begin

    For some popular events, an email login alone may not be enough. The platform may require passport-based identity verification before you can book.

    Ticketlink explains that selected events may show a “Verified Members Only” label. Its verification process can require a valid passport, a camera-enabled smartphone, passport scanning, and facial verification. It also says that a passport already used to verify one account cannot be used again for another account. Ticketlink passport identity-verification guide

    YES24 Global also describes verified-member authentication for selected concerts and musicals using a foreign passport and face recognition. Its guidance says that this method uses a physical foreign passport, not a passport copy, passport photo, national ID card, or driver’s license. YES24 Ticket FAQ

    Enter your passport name exactly

    Use the name shown on your passport when you create an account and enter booking information. Check spelling, name order, spaces, and any middle names carefully. Avoid nicknames, shortened names, and alternate spellings.

    Ticketlink has published event guidance warning that booking-name corrections may not be possible for global bookings and that identification, booking information, and attendee details must match for collection and admission. Ticketlink event notice on identity checks

    Account setup checklist

    • One email address that you can access immediately
    • Your physical, valid passport
    • A smartphone with a working camera
    • A stable internet connection
    • Your passport-name spelling ready to compare character by character

    Do not create duplicate accounts casually. Where passport verification is linked to one account, additional accounts can cause confusion rather than improve your chances of booking.

    Understand general sales and fan-club presales

    General sales are usually the more straightforward route: book through the seller selected for that concert when tickets become available. Fan-club presales can have additional eligibility and matching requirements.

    Depending on the event, a fan-club presale may require an active official membership, a separate presale-verification step, matching details across the fan-club and ticket accounts, or passport verification on a global channel. Selected Ticketlink notices state that fan-club details, purchaser information, and actual attendee details may need to match. Ticketlink global event notice

    Verification is not a ticket reservation

    Keep these steps separate:

    1. Fan-club membership: whether you belong to the official membership.
    2. Presale verification: whether the ticket platform recognizes that membership for the relevant sale.
    3. Successful booking: whether you completed a reservation for an actual seat.

    Completing membership or identity verification may make you eligible to try booking, but it does not guarantee a ticket.

    Check ticket collection and venue entry rules

    Entry procedures differ by concert. One event may use a mobile ticket, while another may require venue collection or conduct a purchaser identity check. The individual concert page is the controlling source.

    YES24 Global says that venue collection can require a physical valid passport and booking confirmation, while also noting that arrangements can vary by show. YES24 Ticket FAQ

    Ticketlink notices for identity-check events have stated that non-Korean attendees may need a physical passport or residence document together with booking information, and that purchaser and attendee information must match. Ticketlink event notice on identity checks

    What to bring

    • Your physical passport
    • Your booking confirmation or reservation number
    • The phone and account used to make the booking
    • Any relevant fan-club confirmation
    • The original payment method, only if the event page specifically requests it

    A screenshot may not resolve an identity-check problem. If a platform or organizer requires a physical passport, a photo of your passport on your phone is not an equivalent substitute.

    Can someone else use your ticket?

    Do not assume that they can. Transferability depends on the terms for that particular concert. Events with purchaser checks, attendee-name matching, or fan-club presales may reject tickets booked under another person’s identity.

    Before buying for a friend, read the event page for rules about purchaser verification, attendee-name matching, on-site collection, fan-club eligibility, transfers, and cancellations. Ticketlink has published notices stating that entry can be denied for a ticket purchased under another person’s identity. Ticketlink event notice on identity checks

    Common mistakes to avoid

    Using an unofficial resale offer

    A social-media post, chat-room offer, or resale listing may not be accepted, particularly when an event checks the original purchaser’s identity. The official primary seller named by the event is the safest booking route.

    Using different names across services

    For some events, the fan-club account, ticket account, passport verification, and booking record can be compared. Review every name field against your passport before you submit it.

    Waiting until the last minute to verify

    YES24 Global warns that verified-member authentication can be delayed by high traffic when attempted immediately before ticket sales. Its current FAQ recommends completing identity verification at least 1–2 days before ticket sales for performances marked “Verified Member Only.” YES24 Ticket FAQ

    Assuming every show uses the same ticket method

    Do not rely only on a platform’s general help page. Read the concert’s own detail page for its mobile-ticket, pickup, verification, and entry instructions.

    A safer booking workflow

    1. Find the official concert announcement.
    2. Open only the seller named in that announcement.
    3. Choose the correct Korean or global booking channel.
    4. Create your account using your passport name exactly.
    5. Complete passport verification early if the event requires verified members.
    6. For a fan-club presale, confirm that fan-club and ticket-account details match.
    7. Read the event page for collection, mobile-ticket, and identity-check instructions.
    8. Save your reservation details and bring your physical passport.
    9. Do not assume that a ticket in another person’s name will be accepted.

    FAQ

    Which ticket website should foreigners use for K-pop concerts in Korea?

    Use the platform named in the official event announcement. If the notice directs international buyers to a global channel, register and book through that channel rather than assuming the Korean site follows the same process. Ticketlink global event notice

    Do I need a Korean phone number to buy a concert ticket?

    Not necessarily. Some platforms offer global services for foreign users, but the booking route and verification method depend on the concert. For selected global events, passport verification may be required. Check the event page before relying on a particular booking method. Ticketlink passport identity-verification guide

    Can I verify my account with a photo of my passport?

    Do not rely on that. YES24 Global’s verified-member guidance says this authentication method accepts a physical foreign passport and does not accept passport copies or photos. YES24 Ticket FAQ

    Should I bring my passport to the concert?

    Yes. A physical passport is the most useful identity document for a foreign visitor when tickets are collected at the venue or when an event conducts purchaser verification. YES24 Ticket FAQ

    Can I buy a ticket for a friend?

    Sometimes, but do not presume that the ticket is transferable. Name-matching rules, fan-club presales, and identity checks may require the purchaser and attendee information to match. Read the individual event page before booking. Ticketlink event notice on identity checks

    Related articles

    Information current as of: 2026-09-17

    Sources and references

  • Best Offline Translation Apps for Korean Menus: Google Translate vs Papago

    Best Offline Translation Apps for Korean Menus: Google Translate vs Papago

    For reading a printed Korean menu without mobile data or Wi-Fi, Google Translate is the best overall choice. Download Korean and your reading language before you leave your accommodation, then use its camera translation feature to scan menu text offline. Google’s help documentation states that camera translation can work offline when the required languages have been downloaded.

    Keep Papago as a second app for short text checks, not as your only offline menu scanner. Papago supports offline text and voice translation, but its official offline mode does not include image translation. For iPhone users, Apple Translate can also provide downloaded, on-device text translation, but it is best treated as a text tool rather than a primary menu-camera workflow.

    Quick comparison: which app should you use?

    • Need to scan a Korean menu through your camera offline: Use Google Translate.
    • Need to type or paste a Korean dish name offline: Use Google Translate or Papago after downloading languages.
    • Want a second opinion on a short dish name: Use Papago after copying the Korean text.
    • Prefer an iPhone built-in option for typed text: Consider Apple Translate, after confirming Korean is available on your device.

    The simplest setup for most visitors is Google Translate for camera reading, Papago for a second text check, and a saved phone note with a few common Korean menu words.

    What “offline” means for menu translation

    Offline translation does not mean that every feature in every translation app works without a connection. Reading a menu photo involves two separate tasks: recognizing the Korean letters in the image and translating the recognized text into English.

    An app may translate typed text offline while still needing an internet connection to translate an image. That difference is especially important when choosing between Google Translate and Papago for restaurant menus.

    Google Translate: the main advantage is offline camera translation

    Google states that its camera translation can work offline after you download the languages you need. Download both Korean and your target language in advance instead of assuming the app will download them when you are at the restaurant. Google Translate Help: Download languages to use offline and Google Translate Help: Translate images

    This makes it the most useful single app when the menu is Korean-only, reception is weak, or you want to avoid using mobile data.

    Papago: useful for offline text, not offline menu photos

    Papago’s offline mode supports text and voice translation for supported languages, including Korean and English. Its official help documentation excludes image, conversation, website, and document translation from offline mode. Papago Help: Offline Translation

    Papago does offer image translation while connected, including translation of selected parts or a full image. Treat that as an online feature rather than a no-signal fallback. Papago Help: Image Translation

    Apple Translate: a lightweight iPhone text option

    Apple’s Translate app can download languages and translate on the device without an internet connection. Before relying on it, download the languages you need and test Korean input and output on your own phone. Apple Support: Translate words and phrases on iPhone

    For Korean menus, it is most practical for typed or pasted Korean text. Keep Google Translate if offline camera scanning is important to you.

    How to prepare your phone before going out

    Set up your tools while you have a stable connection, not while you are trying to order at a restaurant.

    1. Download Korean and your reading language

    In Google Translate, download Korean as the source language and English, or your preferred language, as the target. Use the app’s offline language download controls and wait until both downloads finish. Google Translate Help: Download languages to use offline

    If you plan to use Papago or Apple Translate as well, download their required languages before you leave Wi-Fi.

    2. Test the camera in airplane mode

    1. Turn on airplane mode.
    2. Open Google Translate and select Korean to English.
    3. Open the camera translation tool.
    4. Test it with a Korean sign, a package label, or a menu screenshot.

    This small test confirms that the language files are present and that the camera workflow works on your device.

    3. Save a few menu words

    Machine translation works better when you can recognize basic menu categories yourself. Save these words in a phone note:

    • 메뉴: menu
    • 추천: recommended
    • 대표: signature or house specialty
    • 밥: rice
    • 면: noodles
    • 국: soup
    • 찌개: stew
    • 볶음: stir-fried
    • 구이: grilled
    • 튀김: fried
    • 추가: add extra
    • 포장: takeaway

    These words will not explain every dish, but they can help you tell whether an app has translated a category heading instead of the actual item.

    A reliable workflow at the table

    Take a photo first, then translate

    When possible, take a still photo instead of rapidly moving the camera across a full menu. A stable image makes it easier to select a single line and avoid text from nearby columns.

    Translate one line at a time

    Menus often place dish names, descriptions, options, and other details close together. Translate the dish name first, then translate nearby descriptive words separately. This reduces the chance that the app combines neighboring menu rows into one confusing result.

    Keep the Korean name visible

    Do not depend only on the English result. Keep, copy, or screenshot the original Korean dish name. A broad translation such as “spicy soup” or “mixed rice” may not identify the dish clearly, while the Korean name is useful for a second check or when pointing to your order.

    Use a second app for unclear items

    If a translation seems vague, copy the Korean text into Papago or another text translator. You do not need identical English wording from both apps. Look for agreement on the main idea:

    • Is it rice, noodles, soup, stew, grilled food, or a side dish?
    • Does it indicate cold, spicy, fried, or mixed?
    • Is the text a dish name, an option, or a menu heading?

    Common mistakes and simple fixes

    The camera picks up random background words

    Why it happens: The app may read logos, table patterns, page numbers, or text in a neighboring column.

    What to do: Crop tightly and select only the line containing the dish name. A close, clean photo is usually more useful than one wide shot of the full menu.

    The English is grammatical but not useful

    Why it happens: Many Korean dish names do not have a direct English equivalent, and menu names can be very short.

    What to do: Keep the Korean name and translate surrounding words separately. Look for cooking-method words such as grilled, fried, soup, stew, noodles, and rice.

    The app cannot read the text

    Small print, handwriting, reflections, curved pages, and decorative fonts can reduce image-recognition accuracy. Google notes that unclear or stylized text may not translate accurately. Google Translate Help: Translate images

    • Move closer instead of digitally zooming.
    • Hold the phone parallel to the page.
    • Shift the menu to avoid overhead-light reflections.
    • Take a still photo and crop it.
    • Translate a shorter section rather than the whole page.

    Papago’s image feature does not work offline

    Why it happens: Papago’s offline mode does not include image translation. Papago Help: Offline Translation

    What to do: Use Google Translate with downloaded languages to read the menu image, then use Papago only to check copied Korean text.

    Best setup by traveler type

    Short-term visitor

    Download Google Translate, save Korean and English for offline use, and test the camera once before your first meal.

    Long-term resident

    Keep both Google Translate and Papago. Use Google Translate for offline camera reading and Papago as a second text check for unfamiliar Korean dish names.

    iPhone user who wants fewer apps

    Use Apple Translate for downloaded text translation if Korean is available for your language pair and device. Keep Google Translate if you expect to scan menus offline with your camera. Apple Support: Change Translate settings on iPhone

    FAQ

    Can Google Translate read Korean menus offline?

    Yes. After downloading the required languages, Google Translate can use camera translation offline. Download Korean and your reading language before you need the feature. Google Translate Help: Translate images

    Can Papago translate a menu photo offline?

    No. Papago’s official offline mode supports text and voice translation, but not image translation. Papago Help: Offline Translation

    Which app is more useful for an offline Korean restaurant menu?

    Google Translate is the stronger choice for reading a printed menu with a phone camera and no connection because it supports offline camera translation with downloaded languages. Google Translate Help: Translate images

    Should I use automatic language detection?

    For a Korean-only menu, set the source language manually to Korean. This can reduce misreading of short Korean words, stylized lettering, and menus that mix Korean with English.

    Why does a translation look wrong even after I downloaded languages?

    The problem may be image recognition rather than the downloaded language files. Improve the lighting, take a still photo, crop out surrounding text, and translate shorter selections. Small or decorative text is less reliable. Google Translate Help: Translate images

    Related articles

    Information current as of: 2026-09-20

    Sources and references

  • Seoul Subway Mistakes: How to Check the Right Direction, Transfer, and Exit

    Seoul Subway Mistakes: How to Check the Right Direction, Transfer, and Exit

    The easiest way to avoid getting lost on the Seoul Subway is to check three things before you board: the line number or color, the train’s terminal station, and the exit number at your destination.

    A station name alone is not enough. Check which direction the train is traveling, repeat that check after every transfer, and find your numbered exit before you leave the station. Seoul Subway stations use color-coded line signs, English station information, and numbered exits. Seoul’s official travel guide also advises riders to follow the color-coded signs for the line they need.

    1. Avoid taking the train in the wrong direction

    Trains on the same line travel in opposite directions. Rather than relying on labels such as “northbound” or “outbound,” look for the train’s terminal station: the station at the end of its route.

    What to check on the platform

    • The correct line number and color
    • The terminal station shown for the arriving train
    • The upcoming stations on the platform display or route map
    • Whether your destination appears ahead of the train, not behind it

    Do not board just because the sign shows the right line. Ask yourself: Is this train heading toward my destination?

    A five-second direction check

    1. Find your destination on a subway map or navigation app.
    2. Note the stations immediately before and after your destination.
    3. Check the upcoming-station list on the platform.
    4. Confirm that the terminal station matches the direction you need.
    5. Board only when the route leads toward your destination.

    If you board the wrong train

    1. Get off at the next station.
    2. Follow signs for the platform serving trains in the opposite direction.
    3. Check the terminal station again before boarding.
    4. Recheck your route after you have corrected the direction.

    Do not assume the opposite-direction platform is always directly across from you. Depending on the station, you may need to use stairs, escalators, or an internal passageway.

    2. Transfer without following the wrong signs

    When transferring, follow the signs for your target line rather than heading toward an exit. The key mistake to avoid is reaching the correct line and then boarding in the wrong direction.

    Use the three-part transfer check

    • Correct line: Check the line number as well as the color.
    • Correct direction: Check the terminal station on the new platform.
    • Correct platform: Follow the platform arrow that matches your route.

    At large stations, a transfer corridor can be longer than expected. A long underground walk does not automatically mean you are lost if the signs continue to show your target line.

    When to stop and recheck

    • The line number on signs changes unexpectedly.
    • You reach exit gates before finding the line you intended to transfer to.
    • You have followed a color but have not confirmed the line number.
    • The terminal station on the platform does not fit your route.

    At every transfer, start over: check the line, then the terminal-station direction, then the platform.

    3. Find the correct exit before leaving the station

    Getting off at the right station is only part of the trip. A wrong exit can leave you on the other side of a major road or several blocks from the place you want to visit.

    Seoul Subway exits are numbered, and station signs are provided in Korean, English, and Chinese. See the official Seoul Subway guide for a general overview of the system.

    Use an exit number, not only a station name

    Search for the exact destination in your map app and look for its recommended subway exit. Also note a nearby landmark. Two exits at the same station can lead to very different streets, malls, bus stops, or districts.

    Best exit strategy

    1. Search for the exact place you are visiting before the train arrives.
    2. Check the suggested exit number and nearby landmark.
    3. Save a screenshot if you may have limited connectivity underground.
    4. Follow exit signs while you are still inside the station.
    5. Confirm the number on the sign before you leave.

    The official Seoul transportation guide explains that the subway is a major way to move around the city. For walking navigation, treat the recommended exit as part of your destination details.

    A simple route routine from search to street

    If your route says to take one line, transfer to another, get off at a station, and use a specific exit, turn it into four separate checks.

    1. Before the first train: Confirm the line, terminal station, and that your destination is ahead.
    2. At the transfer: Follow the target line’s number and color, then confirm its direction on the platform.
    3. Before getting off: Reopen your map and confirm the destination station and exit number.
    4. Inside the destination station: Follow the numbered exit signs before heading outside.

    Common Seoul Subway mistakes to avoid

    • Boarding the first train that arrives: Check its terminal station every time.
    • Assuming a transfer is one platform away: Follow signs for the target line until you reach its platform, then check direction again.
    • Leaving before checking the exit: Find the exit number while still inside the station.
    • Following the crowd: Other passengers may be going to a different line, exit, or nearby building. Follow signs, not people.
    • Treating a large station as a single doorway: Allow extra walking time for long transfer passages and widely spaced exits.

    Quick Seoul Subway checklist

    Before boarding

    • I have the correct line number and color.
    • I know the terminal station for my direction.
    • My destination is ahead on the route.

    At a transfer

    • I am following the correct line number and color.
    • I checked the terminal-station direction again.
    • I am still following transfer signs, not exit signs.

    Before leaving the destination station

    • I know the correct exit number.
    • I confirmed the exact destination on my map.
    • I know a landmark or the side of the street to look for outside.

    FAQ

    How do I know which direction to take on the Seoul Subway?

    Check the train’s terminal station and compare the upcoming stops with your destination on the route map. Board the train whose stops lead toward your destination.

    What should I do if I take the wrong subway direction?

    Get off at the next station, locate the platform for the opposite direction, and confirm the terminal station before boarding again.

    Do I need to leave the station to transfer lines?

    Follow the transfer signs for your target line within the station. Seoul’s official visitor guidance recommends following color-coded signs for the line you need when transferring.

    Why does my map give a specific exit number?

    Numbered exits can lead to different streets and landmarks around the same station. Using the suggested exit can reduce unnecessary walking.

    What if I cannot find my exit number?

    Pause near a station map or exit directory, search for your destination again, and follow the numbered signs rather than guessing.

    Related articles

    Information current as of: 2026-09-18

    Sources and references

  • Lost Passport in Korea Before a Flight: Embassy Contact and Replacement Checklist

    Lost Passport in Korea Before a Flight: Embassy Contact and Replacement Checklist

    If you lose your passport in Korea before an international flight, do not assume that a photo or scan of it can replace the original travel document. Start by contacting the embassy or consulate of the country that issued your passport through its official website. At the same time, collect identity and flight evidence, then ask your airline whether the document you may receive can be used for your exact itinerary.

    Your ability to board can depend on your nationality, destination, transit airports, airline, and the travel document eventually issued to you. The most useful approach is simple: find the correct consular contact, prepare a clear document folder, and verify the entire route rather than relying on a general answer.

    1. Confirm that the passport is actually missing

    Before sending messages or changing travel plans, do one focused search. Passports are often found in a luggage compartment, hotel safe, document pouch, or an item of clothing used earlier in the trip.

    Check these places in order

    • Jackets, trousers, backpacks, tote bags, and carry-on bags
    • Every zipped pocket and inner compartment of your luggage
    • The hotel safe, bedside area, desk, and wardrobe
    • Your accommodation’s front desk or lost-and-found desk
    • Recent cafés, coworking spaces, tour desks, taxis, and stations
    • Envelopes or folders used for boarding passes, cash, or residence documents

    Write a short timeline while the details are fresh: when you last saw the passport, where you were, places visited afterward, and whether anyone had access to your bag or room. This makes it easier to explain the situation clearly to the embassy, airline, or accommodation.

    2. Find your embassy or consulate through an official source

    Contact the embassy or consulate of the country that issued the passport. The Republic of Korea’s Ministry of Foreign Affairs provides a directory of foreign missions in Korea. Use the directory to locate the mission, then confirm the contact details and instructions on that mission’s own official website before sending personal information.

    Republic of Korea Ministry of Foreign Affairs: foreign missions in Korea directory

    What to look for on the mission website

    • Lost or stolen passport
    • Consular services or passport services
    • Emergency travel document
    • Consular section contact details
    • Appointment, visit, or document-submission instructions

    Do not assume every mission issues the same type of document or follows the same checklist. Your own country’s authorities decide what replacement or emergency document may be available and what evidence they require.

    A concise message to send

    Subject: Lost passport in Korea — upcoming international flight

    I am a citizen of [country] currently in Korea and cannot locate my passport. I have an upcoming international flight.

    Full name: [name]
    Date of birth: [date]
    Flight route: [full route, including connections]
    Departure date: [date]

    I currently have: [photo ID / passport copy / itinerary / other identity documents]. Please advise which service applies and what I should prepare.

    Use an official form or contact channel when the mission provides one. Do not email full scans of sensitive documents unless the official instructions specifically request them.

    3. Decide whether to file a police or lost-property report

    If the passport may have been stolen, contact the police promptly. For a passport that appears to have been misplaced, you can file a lost-property report through Korea’s Police Civil Service 24 or visit a nearby police station, police box, or patrol division. The official service states that a lost-property report can be submitted online or in person and does not require supporting documents.

    Korean National Police Agency: Lost-property report guidance

    A police report is not a universal requirement for every nationality. Ask your embassy or consulate whether it requires one for a replacement passport or emergency travel document. If the passport was stolen, tell the police that it is a suspected theft rather than describing it only as a lost item. For a crime in progress or an immediate safety risk, call 112.

    4. Prepare identity and itinerary evidence

    Organize what you have before you receive a reply. A complete, easy-to-read folder can reduce repeated questions and help you describe your circumstances accurately.

    Useful items to collect

    • A photo or scan of the missing passport’s identity page, if available
    • Another government-issued photo ID
    • A previous or expired passport, if available
    • Your flight itinerary, booking reference, and complete route
    • Your hotel or current residential address in Korea
    • Recent passport-style photos, if you already have them
    • Any available proof of nationality or identity
    • Your written timeline of when and where the passport went missing
    • Copies of messages from the airline and embassy or consulate

    The U.S. Department of State’s international travel checklist recommends keeping copies of travel documents separate from originals. It also notes that identification, evidence of citizenship, a travel itinerary, and a passport photo can be useful for a passport replacement abroad. These details are not a universal replacement-document checklist; other nationalities may have different requirements.

    U.S. Department of State: International Travel Checklist

    If you do not have a passport copy

    Collect alternative details that can help establish your identity: your full legal name, date and place of birth, passport number if it appears in a saved booking profile, approximate issue and expiry dates, and the issuing authority. Search email and travel accounts for terms such as “passport,” “flight confirmation,” “check-in,” or the passport number.

    5. Check your flight route with the airline

    A replacement passport or another travel document is not automatically accepted for every trip. Contact the airline with your actual route, including every connection, rather than asking only whether you can “fly home.”

    Questions to ask the airline

    • Can my booking remain active while I arrange a replacement document?
    • What document details are needed to update my check-in information?
    • Does any transit airport create separate document requirements?
    • Can the airline review the document type required for boarding on this itinerary?
    • If I cannot use the original flight, what options may be available under my ticket conditions?

    IATA advises travelers to check requirements close to departure because requirements can change. Its Travel Centre provides passport, visa, and health-travel information based on traveler and destination details. However, IATA also notes that having listed documents does not guarantee admission, because local authorities make final entry decisions.

    6. Protect personal information during the process

    A missing passport contains sensitive identity data. Keep records in one secure folder and share only what an official contact channel asks you to provide.

    • Use the embassy’s official domain and published contact page.
    • Save screenshots of messages, booking updates, and reference numbers.
    • Do not post passport images, passport numbers, or booking references on social media.
    • Do not send ID scans to unofficial travel-help accounts or messaging groups.
    • If someone says they found the passport, ask for limited, non-sensitive confirmation before disclosing more information.
    • Keep a note of who you contacted, when, and what they said.

    Common mistakes to avoid

    Waiting until you arrive at the airport

    Airports are set up for passengers who already hold acceptable travel documents. If possible, begin the embassy and airline contacts before going to the airport.

    Relying on old search results or copied listings

    Addresses, contact methods, and document instructions can change. Start with the Korean Ministry of Foreign Affairs directory, then use the mission’s current official website.

    Assuming a phone photo is enough to board

    A passport image may help identify you during a replacement request, but it is not the same as an original travel document. Boarding acceptance depends on the specific route and document.

    Leaving out a transit airport

    A connection may have requirements separate from those of the final destination. Give both the airline and the embassy your complete itinerary.

    One-page checklist

    • Full name, date of birth, nationality, and current Korean address
    • Passport copy or photo, if available
    • Alternative photo identification
    • Flight itinerary, booking reference, and full route
    • Short timeline of where the passport was last seen
    • Official embassy or consulate contact page
    • Airline customer-service contact details
    • Secure folder for emails, screenshots, and reference numbers
    • Plan for accommodation, money, and essential belongings while arrangements are underway

    FAQ

    Can I fly from Korea with a photo of my passport?

    Do not assume that you can. A photo or scan can help provide information to an embassy or airline, but boarding depends on the document accepted for your nationality, airline, destination, and transit points.

    Which embassy should I contact?

    Contact the embassy or consulate of the country that issued your passport. The Republic of Korea Ministry of Foreign Affairs directory can help you locate foreign missions in Korea.

    Should I contact the airline before I receive a replacement document?

    Yes. Tell the airline that the passport is missing, provide the full itinerary, and ask what document information it needs to review the booking and transit requirements.

    What if I do not have a copy of the missing passport?

    Gather other available identity and travel evidence, such as photo ID, an old passport, booking confirmation, a saved passport number, and a clear timeline. Your embassy or consulate can tell you what is relevant to its process.

    Can I use a replacement document for any destination?

    Not necessarily. Requirements can differ by nationality, destination, transit airport, airline, and document type. Check the route again after you know which document you will hold.

    Key takeaway

    A lost passport before a flight is best handled as a coordination task: use an official channel to contact the embassy or consulate that issued it, prepare identity and itinerary evidence, and verify the exact route with the airline. Do not make travel decisions based only on a passport scan, a social-media answer, or information intended for another nationality.

    Related articles

    Information current as of: 2026-09-16

    Sources and references

  • E-7 Korea Work Visa: What Applicants and Employers Should Prepare

    E-7 Korea Work Visa: What Applicants and Employers Should Prepare

    The E-7 visa is not a general work permit for any job in Korea. It is a status of stay for activities designated by the Minister of Justice under a contract with a Korean public or private organization. For a successful application, the proposed job, the applicant’s qualifications, the employment contract, the offered salary, and the employer’s business need must fit the applicable E-7 category and occupation rules.

    For an applicant abroad, the usual route may involve the employer applying for a Confirmation of Visa Issuance and the applicant then applying at the responsible Korean embassy or consulate. A person already staying in Korea may instead need a change of status application. The correct route and document list depend on the applicant’s current status and the specific E-7 subcategory.

    Eligibility: does the role fit E-7?

    Under Korea’s status-of-stay framework, E-7 covers designated activities performed under a contract with a Korean organization. It includes several distinct subcategories, so applicants and employers should not assume that all E-7 routes use the same criteria. See the official status-of-stay schedule.

    • E-7-1: professional employment, commonly relevant to specialist, management, and professional roles.
    • E-7-2: designated semi-professional employment.
    • E-7-3: designated skilled-function employment.
    • E-7-4: a skilled-worker points-based route, generally distinct from an ordinary overseas professional recruitment case.

    A four-part check before preparing an E-7-1 case

    1. Confirm the occupation and actual duties. A job title by itself is not enough. The duties, work plan, and occupation classification should support the E-7 category.
    2. Match the applicant’s background to the work. Degrees, licences, qualifications, and career records should directly support the duties stated in the contract.
    3. Document why the employer needs this hire. The company may need to provide evidence of employment necessity or, where applicable, a recommendation from the competent authority.
    4. Check the current salary standard. Salary thresholds and occupation-specific rules can change. Confirm the notice in force when filing.

    For applications subject to the Ministry of Justice’s 2026 standards, the announced annual minimum salary figures effective from February 2026 are KRW 31.12 million for E-7-1, KRW 25.89 million for E-7-2 and E-7-3, and KRW 26.00 million for E-7-4. These are category-level figures and do not replace a check of the requirements for the precise occupation. Read the Ministry of Justice explanation on the 2026 standards.

    Application conditions and required documents

    Organize the application in two connected files: an applicant qualification file and an employer sponsorship file. The evidence should consistently show why this company needs this position and why this applicant is qualified to perform it.

    Applicant documents to prepare

    • Valid passport and passport copy
    • Recent visa photograph
    • Signed employment contract
    • Degree certificate, licence, or other qualification evidence where relevant
    • Career certificates or employment-verification letters with duties and dates
    • Occupation-specific evidence requested for the role
    • Documents required by the Korean embassy or consulate handling the visa application
    • Confirmation of Visa Issuance number or approval details, if that route is used

    Korean diplomatic missions commonly require a visa application form, passport, photograph, employment contract, and a Confirmation of Visa Issuance for applicants using that route. The responsible mission may request additional documents after reviewing the case. Example of official E-7 visa requirements from a Korean consulate.

    Employer documents to prepare

    • A detailed employment contract stating duties, remuneration, and key employment terms
    • Business registration certificate and, where requested, corporate registration documents
    • A specific job description covering duties, work location, reporting structure, and employment period
    • Evidence of employment necessity or an employment recommendation when applicable
    • Documents showing the company’s operational capacity if requested
    • Documents showing that the offered remuneration meets the applicable standard
    • A clear explanation linking the applicant’s education and career to the proposed role
    • Former-workplace consent or release documents if required in a workplace-change case

    For an in-Korea E-7 change of status, the official rules list documents including an employment recommendation or evidence of employment necessity, an employment contract, proof of education and career, and business registration documents. Additional evidence may be required depending on the case. Check the Immigration Control Enforcement Rules.

    Practical document-quality checklist

    • Make the job description specific; broad labels such as “manager” or “specialist” are not enough on their own.
    • Ensure the contract, job description, business explanation, and career evidence describe the same type of work.
    • Ask former employers to include exact dates, position, department, and a concise description of actual duties in career certificates.
    • Check in advance whether translations, notarization, apostilles, legalization, or other authentication are required for documents issued outside Korea.

    Application procedure

    Route 1: the applicant is outside Korea

    For many E-7 cases, the Korean inviter or an authorized representative can apply online for a Confirmation of Visa Issuance through the Korea Visa Portal. The portal states that this process allows an inviter to apply without visiting a domestic immigration office, after which the applicant may seek visa issuance at an overseas Korean diplomatic mission using the approved confirmation. E-7 is among the eligible statuses. Korea Visa Portal: Confirmation of Visa Issuance.

    1. Confirm the correct E-7 subcategory and eligible occupation.
    2. Prepare the employer sponsorship evidence and applicant qualification documents.
    3. Apply for a Confirmation of Visa Issuance if the route is available for the case.
    4. Provide the confirmation number or approval details to the applicant.
    5. The applicant applies for the visa at the Korean embassy or consulate responsible for their residence area.
    6. After entry, complete any required post-entry registration procedures.

    The Korea Visa Portal lists a passport-copy file, a color photo file measuring 3.5 cm by 4.5 cm, and status-specific supporting documents among the preparation items for this process.

    Route 2: the applicant is already in Korea

    An applicant who is lawfully staying in Korea may need a change of status of stay rather than an overseas visa application. Whether this is allowed depends on the person’s present status, the intended E-7 activity, and the applicable immigration rules.

    Do not assume that visa-free entry, visitor status, or another short-term stay can always be changed to E-7 inside Korea. Confirm the permitted route with the competent immigration office before setting a work start date or beginning employment.

    Route 3: changing or adding a workplace

    An E-7 holder should not begin work for a new employer merely because a new contract has been signed. Depending on the facts, a workplace change or addition may require permission or a report, along with the new contract, company documents, and evidence supporting the employment need.

    Fees and processing time

    There is no single dependable E-7 fee or processing-time figure for every applicant. Visa fees can vary by nationality and by the payment rules of the Korean diplomatic mission. Processing also varies by E-7 category, occupation, document completeness, additional-document requests, immigration-office workload, and mission-specific screening.

    • Check the current fee directly with the immigration office or diplomatic mission handling the case.
    • Do not book non-refundable travel based only on an estimated timeline.
    • Do not resign from current employment or set a final start date until the required permission is in place.

    Key cautions

    • Do not start work early. A signed contract does not itself authorize employment in Korea.
    • Do not rely only on the job title. Immigration may examine the actual duties and whether they fit the designated occupation.
    • Do not treat a degree as an automatic approval. The relevant occupation criteria may assess education, qualifications, and work experience differently.
    • Do not treat E-7-4 as interchangeable with E-7-1. E-7-4 is a points-based skilled-worker route with its own system.
    • Recheck annual standards. Salary notices, occupation guidance, quotas, and documentary requirements can change for a new application, extension, or workplace change.

    E-7 compared with other Korean work statuses

    • E-1 Professor: for qualifying teaching or research at higher-education institutions.
    • E-2 Foreign Language Instructor: for eligible foreign-language instruction work.
    • E-3 Researcher: focused on research and development activities.
    • E-4 Technical Instructor or Technician: generally focused on specialized technical knowledge or guidance.
    • E-5 Professional: for work requiring a profession recognized under Korean law.
    • E-7: for designated professional, semi-professional, skilled, or points-based activities; it is broad but requires a close match among the job, employer, and applicant.
    • E-9 Non-Professional Employment: for eligible non-professional work under the foreign-worker employment system, not for roles requiring the specialized qualifications generally expected in E-7 cases.
    • D-10 Job Seeker: for qualifying job-seeking or preparation for a work-status change; it does not provide unrestricted work authorization.

    Frequently asked questions

    Is E-7 the same as a general work permit in Korea?

    No. E-7 is a status of stay for designated activities. The role, employer, applicant qualifications, salary, and documents must fit the applicable E-7 category and rules.

    Can any Korean company sponsor an E-7 visa?

    Not automatically. The employer must be able to show a legitimate employment need and provide the required company and employment documents. Some cases may require a recommendation from a relevant authority or other evidence of necessity.

    Do I need a university degree for E-7-1?

    Do not assume that a degree is either a universal requirement or a guarantee of approval. The applicable occupation criteria may evaluate education, licences, qualifications, and career evidence differently. Check the current standard for the specific occupation.

    Can I apply for E-7 after arriving in Korea as a visitor?

    Do not assume that you can. The availability of a change of status depends on the current status of stay and case-specific rules. Confirm the permitted route before entering Korea for work or beginning any employment.

    Can I work for two companies on E-7?

    Only after the required workplace-addition permission or reporting procedure has been completed where it applies. A second employment contract alone is not sufficient authorization.

    What salary must an E-7 applicant receive in 2026?

    The Ministry of Justice announced category-level annual minimum figures effective from February 2026 of KRW 31.12 million for E-7-1, KRW 25.89 million for E-7-2 and E-7-3, and KRW 26.00 million for E-7-4. Recheck the current annual notice and the rules for the exact occupation before filing.

    How long does E-7 processing take?

    There is no universal timeline. It depends on the route, the processing office or consulate, the E-7 category, the completeness of the documents, and whether additional review is needed.

    Final filing check

    Before filing, confirm the exact occupation code and duties, qualification alternatives, employer eligibility rules, any quota or recommendation requirement, document-authentication rules, permitted status-change route, current filing and consular fees, and the expected processing procedure with the authority handling the case.

    Related Korea visa guides

    Professional immigration help

    If you need help checking your Korean visa eligibility or preparing an immigration application, Darum Administrative Office is a Ministry of Justice-registered immigration application agency.

    Immigration & Visa Consultation →

    Information current as of: 2026-09-15

    Sources and references